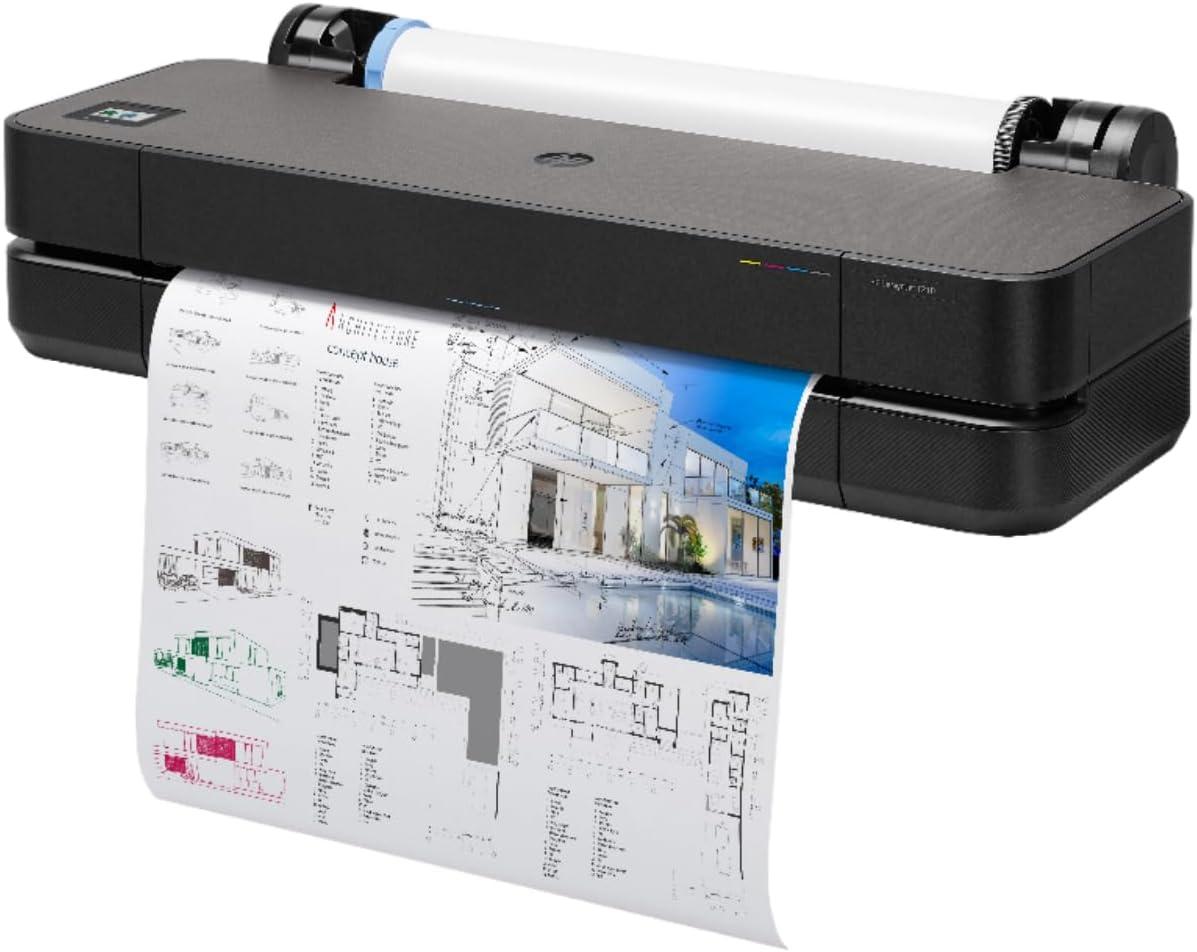
Sliding it a few inches to the side, you notice how its weight settles with a steady, grounded feel—considerable but not awkward to move. Your palm lingers on the matte front edge; the plastic is faintly textured, warm to the touch, adn the paper tray flips with a restrained, confident motion. Powering up produces a low, consistent hum, and small, decisive clicks mark the feed and cutter as you load a roll; the control panel lights up with a calming, even glow. After the first few sheets you start thinking of it simply as the T-series plotter—the HP designjet T210—an object that quietly asserts its presence in the room without making a fuss.
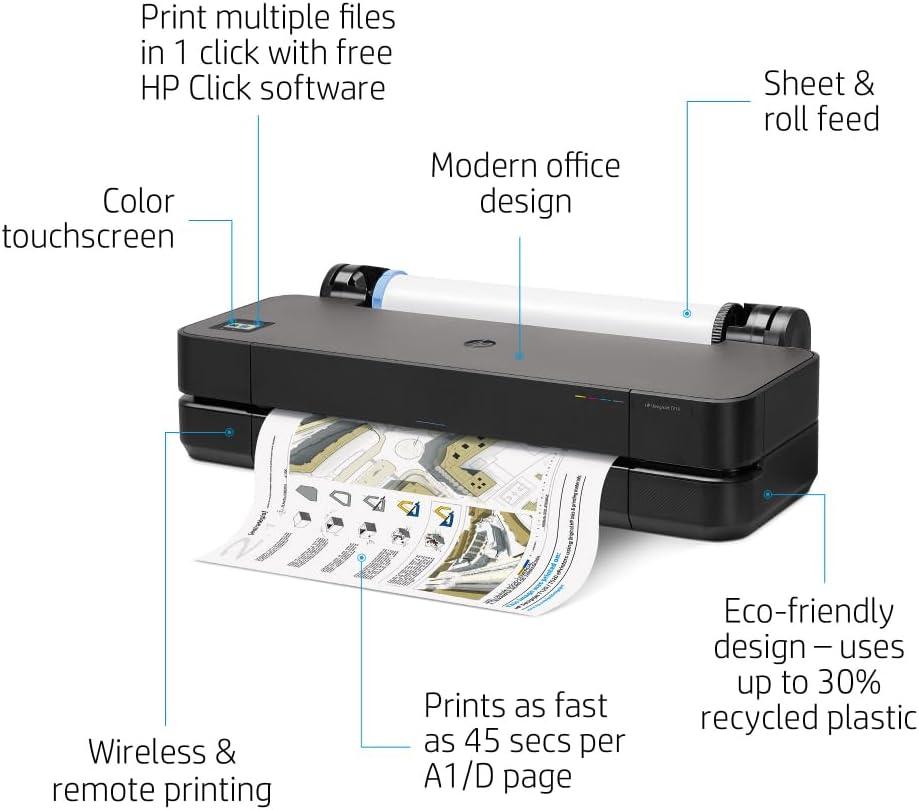
When you first spot the twenty four inch HP designjet T210 in your workspace
When you first spot the large-format plotter in your workspace, it occupies a definite presence without shouting for attention. The matte and plastic surfaces sit low and horizontal, a broad front that lines up with your worktable; a paper roll tucked at the back and the output tray at the front give it a clear orientation. From across the room you notice the small cluster of lights and the tilted control surface—simple visual cues that show where to look when a job starts or somthing needs your glance.It fits beside other equipment in a way that feels planned,though you’ll still shift a chair or nudge a trolley now and then to give it breathing room.
Up close,your interactions are quick and habitual: a glance at the status LEDs,a gentle nudge to clear stray paper,the brief pause when you slide a fresh roll into place or smooth a print as it emerges. It tends to live in the background of your routine—dusting the top, moving a carton nearby, occasionally angling a sheet on a table to catch the light—small, everyday motions rather than formal upkeep. even when you’re not printing, the machine signals readiness in familiar ways, and those small rituals of checking and adjusting become part of how it sits in the room.
What the casing, the stand and the paper path feel like when you handle the unit
When you pick the unit up to position it or open a panel, the outer shell feels like a deliberately understated plastic — matte, slightly textured, and resistant to obvious fingerprints. Seams and access doors meet with a short, mechanical snap rather than loose rattling; panels lift or hinge with modest, predictable resistance so you don’t find yourself juggling them. The stand gives a sense of being engineered to sit low and steady: when you nudge the assembled printer it rarely wobbles, and you tend to grip the lower frame or the rear edge rather than the top cover when you move it. Small details become tactile cues — the cover release, the panel catches, the screw-fastened joints — that tell you where to press or hold without needing to look closely.
Opening the paper path reveals similarly tactile feedback. The roll spindle slides into place and locks with a distinct click, and the sheet feed tray slides with a soft, consistent resistance; paper guides move on smooth rails and provide just enough friction to keep media aligned as you nudge it. The cutter engages with a short, mechanical throw you can feel through the front lip, and printed sheets exit onto a shallow support that keeps them from curling free. You also notice everyday maintainance touchpoints while handling the path: dust and paper fibres collect at the feed rollers and cutter edges, so you tend to give those areas a casual wipe during routine use.
- Casing — matte, firm plastic with tight seams
- Stand — rigid support, low center of mass, minimal play
- Paper path — audible locks, smooth guide movement, tactile cutter action
| Component | Handling note |
|---|---|
| Roll spindle | Slides and locks with an audible click |
| Sheet feeder | Tray slides with gentle resistance; guides are tactile |
| Cutter/exit lip | Mechanical feel on actuation; supports prints without obstruction |
Where you can place it in a crowded studio, the actual footprint and reach you need

In a busy studio you’ll usually treat this plotter like a small workstation: positioned close enough to reach the control panel and feed area without stepping away from your desk, but with a clear zone in front so long prints can exit flat and be collected. You’ll often slide it against a wall to save floor space, then pull it forward briefly when loading a roll or swapping cartridges; that little shuffle is a normal part of the routine. Routine interactions tend to happen at the front and top—unblocking those sightlines makes loading, grabbing a print, or wiping dust off the surface less fussy. In day-to-day use you also find yourself angling the unit a touch so the paper comes toward your preferred side for trimming and inspection rather than tangling against a shelf or another table.
- Front access: about an arm’s reach clear so you can retrieve full-length prints without folding them under your arm;
- Rear clearance: a small gap behind the unit to accommodate the spindle and let a roll sit straight;
- Side room: a little lateral space for opening doors and for the cutter to operate unobstructed.
| Operation | Typical clearance (approx.) | Why it matters |
|---|---|---|
| Print retrieval | 2–3 ft in front | Allows prints to be removed flat and checked promptly |
| Roll loading | 6–12 in behind | Space for the spindle and paper to sit without catching |
| Routine access | 1 ft each side | Room to open panels and reach cartridges or the cutter |
When you’re using it regularly you’ll notice small habits forming: keeping a rag, tools, or a trimming board nearby; nudging the machine forward for a quick service check; or standing rather than sitting during roll swaps because it’s easier to see the feed path. These everyday adjustments shape how much usable floor and counter space the unit really occupies in practice, more than the bare outline you first measured. cleaning and quick checks tend to be part of that presence—wipe-downs and cartridge access happen where you’ve left the machine accessible rather than tucked completely away.
How its size, throughput and consumables line up with what you actually need
Footprint and placement tend to matter more in everyday use than on paper: the unit slips into tighter workspaces than larger wide-format devices, yet still requires a bit of clearance behind and above for loading rolls and routing cables. In practice that means it can sit near a bench or against a wall without dominating the room, but swapping a roll or sliding a sheet tray back in place is one of those small, routine actions that interrupts workflow briefly. The front access to media and consumables keeps most interactions visible and straightforward, and the built-in cutter and output area collect prints without much rearranging of the workspace, though larger sheets will need a bit of room to hang or be trimmed after printing.
Throughput and consumable rhythms show up in everyday scheduling: short, single-sheet jobs pop out quickly while longer poster runs create a steadier cadence of ink usage and occasional pauses for spool or cartridge changes. Cartridges and the printhead are user-replaceable and arrive as obvious moments in the workflow — colors can run down unevenly depending on whether line drawings or full-color posters are being produced, and periodic maintenance cycles (like head checks and brief cleaning) consume small amounts of ink. replacement supplies are widely available and the initial set included with the device eases the first few projects; over time,planning for staggered cartridge orders and the occasional printhead swap becomes part of a routine rather than a surprise.
| Typical situation | Observed behavior |
|---|---|
| Quick single prints or proofs | Fast turnaround with little setup |
| Multiple large posters back-to-back | Steadier ink draw, occasional pauses for roll or cartridge swaps |
Full specifications and current configuration details are available on the product listing.
How you load rolls, swap ink cartridges and preview a large print during a typical job
When you handle media for a typical job you’ll notice the roll loading feels more like positioning than wrestling: the spindle seats into place and the roll sits neatly across the feed, and the printer’s front panel usually confirms the detected width before it takes up the slack.In routine use you tend to nudge the roll to keep the edge straight and watch the printer’s brief prompts as it aligns and cuts the leading edge; swapping rolls mid-project is something you do while the job queue pauses, and the machine will often indicate the chosen source so you can be sure the right roll is feeding. Ink cartridges live behind the front access; when a color drops low an alert appears and you open the door to replace just that cartridge — the slots are colour-coded and the replacements click in place, though they sit snugly and sometimes need a small repositioning to seat cleanly. You’ll also notice a little ink residue around the access area from everyday use,so a quick wipe after swapping cartridges is a normal part of the routine rather than a formal maintenance task.
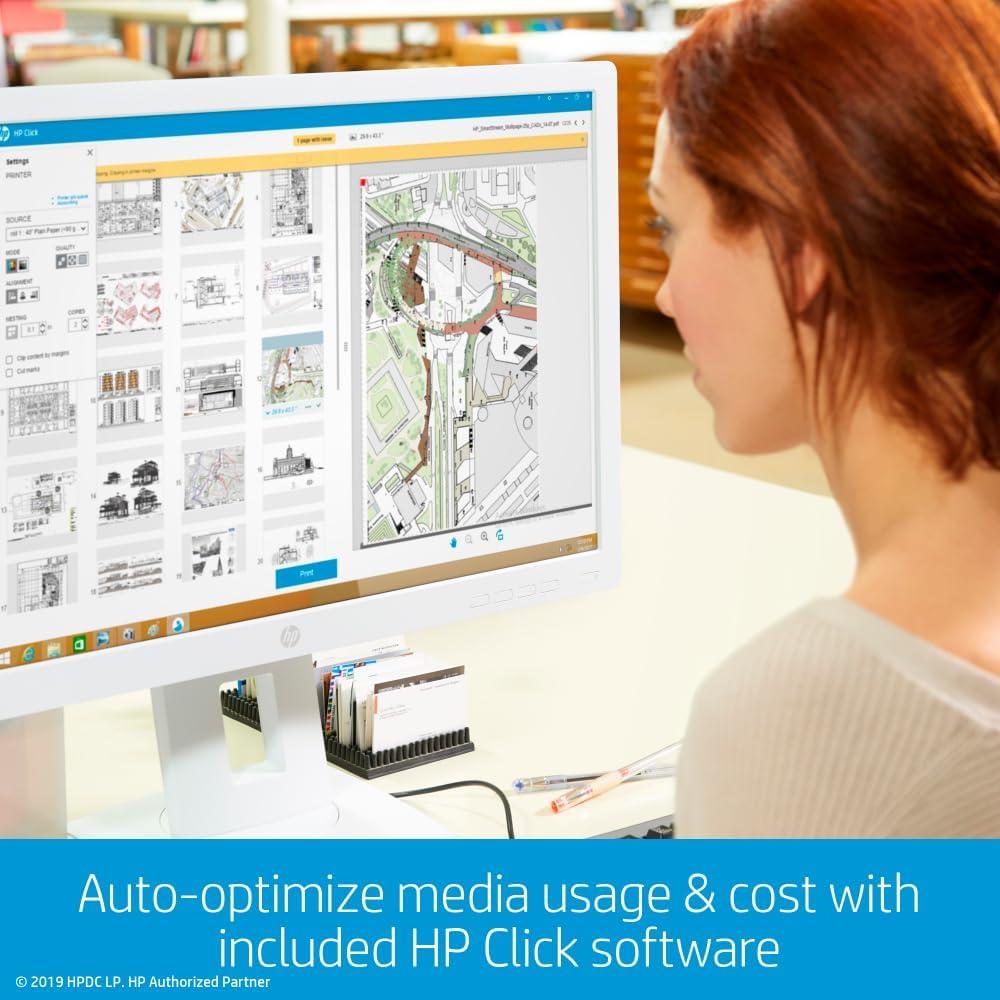
Previewing a large print tends to happen in two places: on your computer as you submit the job and on the printer’s interface while it starts. From the driver or HP Click you see a full-scale layout that shows how pages will tile or where margins fall; this is where you catch scaling issues or unintended crops. The printer’s own display gives a compact thumbnail and status as the first passes are printed, which is helpful when you’re confirming media alignment or waiting for a long poster to emerge.Typical things you watch for in those previews include the image scale, how the file will split across the roll, the visible margins, and an approximate color rendering — all of which tend to make the difference between stopping to adjust a job and letting it run straight through.
- Scale: whether the drawing is true to size or automatically scaled
- Tiling: how the file spans the roll and where joins will occur
- Margins: the printable area and edge clearance shown
- Color preview: an on-screen approximation rather than a final proof
How finished CAD sheets and posters sit on your wall and how people around you react
When you pin or frame a finished CAD sheet or poster on the wall it usually reads as a single object rather than a stack of prints.From a few steps back the composition—whether a dense line plan or a photographic poster—holds together, and text and annotations stay legible without you having to lean in.At closer range you notice the paper’s response to the wall: some sheets lay perfectly flat after trimming and a night under a flat book,while others tend to lift slightly at the corners and need a gentle press or a small re-tape. Light across the surface can make fine lines look crisper in some spots and softer in others depending on the paper finish; the way an image or drawing catches a lamp or window tends to change what viewers notice first. Routine presence is minimal — a quick dusting now and then, an occasional nudge to straighten a corner — and the prints generally remain usable display pieces without elaborate upkeep.
- Taped — low profile, quick to change but can leave small marks over time
- Pinned — slightly more forgiving of minor curl, easy to reposition
- Framed — flattens and protects; changes perceived contrast depending on glazing
People around you react in ways that reveal what the prints are doing in the room more than what the printer did to make them. Colleagues often gather close to trace a line, point to a dimension, or compare a detail to a monitor image; their behavior is practical and tactile — fingers hover, pens tap, conversations pause while someone follows a path on the drawing. Non-technical visitors tend to comment on scale,color,or the overall visual impact and may step back to take a photo or circle a portion with their eyes rather than their hands. The table below summarizes these typical responses in straightforward terms.
| Viewer | Typical reaction |
|---|---|
| Team members | Inspect details closely, use as active reference during discussion |
| Clients or stakeholders | focus on scale and clarity, ask for explanations of highlighted areas |
| casual visitors | Notice overall composition and color, often take photos or linger briefly |
How It Settles Into regular Use
Living with the HP DesignJet T210, you notice it slips into the background of daily routines rather than making a scene; over time it simply becomes another useful presence. It takes up a corner of the workspace,the top picking up faint scuffs from rolled prints and the floor around it rearranging itself to make room for paper and tools. In regular household rhythms you reach for it almost without thinking when a poster or plan is needed, the action folding into habit as it’s used day after day. It settles into routine.
As an Amazon Associate I earn from qualifying purchases. Amazon and the Amazon logo are trademarks of Amazon.com, Inc, or its affiliates. All images belong to Amazon