Looking to add a touch of flair to your wardrobe without breaking the bank? DIY capped toe flats may be the perfect solution for you. With just a few simple materials and a little bit of creativity, you can transform a plain pair of flats into a stylish and on-trend accessory that will elevate any outfit.
One of the best things about DIY capped toe flats is that they are incredibly versatile. Whether you prefer a classic black and white look or want to experiment with bold colors and patterns, the possibilities are endless. You can customize your flats to match your personal style and create a one-of-a-kind pair of shoes that will make a statement wherever you go.

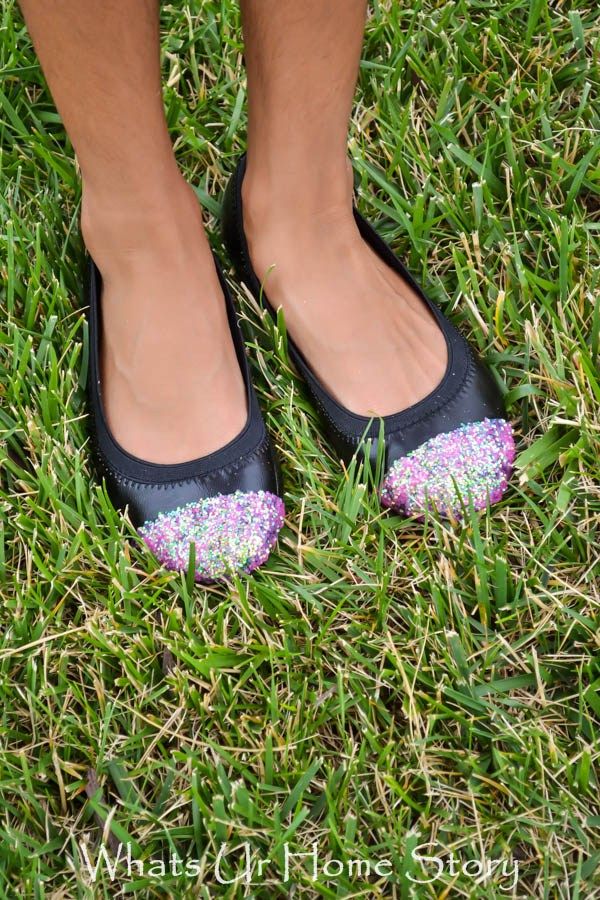
To create your own DIY capped toe flats, you will need a few basic supplies such as fabric paint, a paintbrush, and masking tape. Start by choosing a color or pattern that you want to use for the cap of your flats. You can opt for a solid color for a subtle look or get creative with stripes, polka dots, or geometric designs for a more eye-catching effect.
Next, use the masking tape to create a clean line between the cap of the shoe and the rest of the flat. This will ensure that your design looks neat and professional. Once you have secured the tape in place, use the paintbrush to apply the fabric paint to the toe area of the shoe. Allow the paint to dry completely before carefully removing the tape to reveal your finished design.
DIY capped toe flats are a fun and budget-friendly way to add a pop of color and personality to your footwear collection. By customizing a pair of flats with your own unique design, you can showcase your creativity and individuality with every step you take. So why not give this trendy DIY project a try and see how you can elevate your style with a simple pair of capped toe flats.