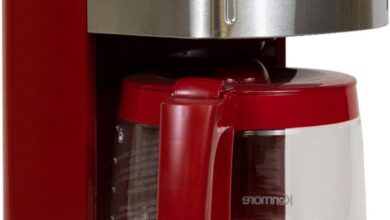
You lift it from the box and it settles into your hands with a reassuring weight, not too light, not fiddly. The stainless-steel face feels cool under your palm, the brushed finish catching the light in thin,domestic streaks while the rotary knob turns with a satisfying,slightly resistant click. A quiet click and a ring of LEDs announce power-up, and that first hiss from the steam wand sounds more mechanical than theatrical. The listing calls it the 20‑Bar Espresso Machine & Coffee Machine,but in your kitchen it reads as a slim,workmanlike presence—the steam wand swinging with a solid heft,the drip tray and water reservoir aligning without fuss. Small seams, snap-on parts and the overall balance register instantly: lived-in, no-nonsense, and ready for repeat handling.
Your first morning with it on the counter: the machine as it appears in everyday life

When you first set it on the counter and wake to make coffee, it reads like a familiar object rather than a gadget. The machine’s silhouette catches the kitchen light; buttons and an illuminated ring briefly tell you it’s warming up without needing a close look. You reach for a cup, place it beneath the spout, and the tray hums slightly under your palm — not loudly, just enough to remind you a process is starting. In the few minutes before your coffee pours, you tend to clear a small patch of counter, nudge the steam wand into a resting position, or lift the removable tray to see if condensation pooled overnight; these are small, habitual touches that become part of the morning choreography.
At a glance you notice practical details that shape how the machine fits into routine: the slim front face that leaves space for a sugar jar, the easy-to-clean surfaces that show fingerprints in bright light, and the way the frother nozzle sits ready for a quick skim of milk. A little corner of the counter becomes the machine’s territory — you may keep a tamp, a spoon, or a spare capsule holder nearby, and the drip tray will occasionally need a quick wipe after the first cup. Morning cues are subtle and repeated: the glow of the controls, the brief hiss as steam settles, and the gentle clink of a cup settling on the tray. These small, lived interactions — pausing to top off water, flicking a switch, wiping a damp ring — are what the machine looks like in everyday life, not as a list of specs but as part of how your morning unfolds.
What the stainless steel, plastic trims and seams tell you when you lift and touch it

When you pick the machine up, the first things your hands notice are weight and balance: a steady heft in the lower half and a predictable center that keeps it from tipping as you shift it across the counter. The stainless steel panels feel cool and slightly textured under your fingertips,while the plastic trims have a warmer,more forgiving touch — the contrast is immediate when you move from a brushed faceplate to a matte bezel or button surround. As you cradle it, removable pieces give subtle clues about fit: the water tank or drip tray slides with a little resistance and clicks into place, and fasteners or seams near service points reveal whether components sit flush or need a little nudging when you reseat them.
Getting closer, your touch reads the seams and joins in small ways that sight alone can miss. Press around access panels and edges to find where tolerances are tight and where paint or molding leaves a faint ridge; the capsule slot and wand mount are places where alignment shows up as either a seamless gap or a thin, catchable lip. You might notice tiny crevices where residue can collect, and the removable nozzle or wand feels either snug or slightly loose at its connection. A few short cues to look for as you run fingertips along the machine:
- Surface temperature: stainless chills quickly but warms during operation;
- Panel joints: uniform gaps suggest careful assembly, while uneven joins can be felt more than seen;
- Trim texture: glossy plastics slide under your palm, matte trims give a little traction.
Touching these areas as part of routine use also tells you where simple upkeep — wiping seams, checking removable parts for snug fit — tends to be needed most.
How you interact with the buttons, dial and stainless steel milk frother during a shot
When you start a shot, your attention naturally lands on the illuminated controls: the buttons give immediate feedback — a soft click or a slight resistance — and the LED ring or icon changes as the machine moves from preheat to brew. The dial feels intentional under your thumb; turning it adjusts the active setting with a small, steady motion rather than a jumpy spin, and you can sense small pauses where the control registers a change.During extraction you frequently enough glance between the cup and the control panel to confirm the indicator states; in practice you sometimes tap a button mid-shot to stop or alter the programmed volume, or make a subtle twist of the dial if the pour looks off. These interactions are punctuated by short pauses as the machine reaches target temperature or pressure, so your timing of presses and turns tends to be a bit rhythmic rather than rushed.
Using the stainless steel milk frother while a shot runs introduces a different set of movements. You position your pitcher,angle the wand into the milk,and engage steam with the same panel controls or a quick dial adjustment — the wand responds immediately and produces a steady stream that you can nudge by small wrist movements to texturize the milk. Steam condensation and stray droplets make a quick wipe part of the routine,and the removable nozzle is something you habitually pop off for a rinse between drinks rather than a formal cleaning session. In some cases you steam while the shot finishes and in others you wait a beat; those little timing choices change how often you reach for the buttons or rotate the dial during a single serving.
- Buttons: tactile confirmation and visible indicator changes while brewing
- Dial: fine, momentary adjustments you make mid-pour
- Milk frother: steady steam control and routine wiping/removal after use
A week of your routines: pulling N capsules, tamping grounds and quick cappuccinos in real use

Across the week you settle into a rhythm: weekday mornings are quick and mostly capsule-driven, while evenings or a relaxed Saturday you pull a shot from freshly tamped grounds. Making a capsule espresso is often a two-step mental checklist — insert, press, and multitask while the shot pours — and that small pause between shots becomes a predictable beat in a busy morning. When you use ground coffee you handle the portafilter, tamping with whatever pressure feels right in the moment; some mornings you tamp deliberately, other days you do a firmer press as time is tight. Quick cappuccinos usually happen between meetings or after a run: you steam a small pitcher, work the milk briefly with the wand, and pour immediately. A few habitual touches return every day — a quick wipe of the wand, emptying the drip catcher every couple of days, and a moment to let the group head rest before the next pull — and those small actions fold into how you use the machine rather than feeling like separate chores.
Patterns emerge without planning: you tend to reach for capsules when speed matters, and for tamped grounds when you can spare ten extra minutes to tweak grind and dose. Midweek you sometimes make two quick cappuccinos back-to-back for a partner or a guest, which reveals how the machine behaves in sequence and how the wand recovers between steams. Below is a simple view of a typical week in practical terms — what you usually brew and when — that reflects how these small choices shape the routine rather than strict rules.
- Capsules: mornings and rushed afternoons
- Tamping grounds: relaxed mornings, weekend experiments
- Quick cappuccinos: between tasks, often one-handed or abbreviated
| Day | Morning | afternoon/Evening |
|---|---|---|
| Mon–Fri | 1–2 capsules | occasional quick cappuccino |
| Sat | tamped shot, milk experiment | capsule for convenience |
| Sun | longer tamping/grind tweaks | easy capsule or skipped |
How the machine measures up to your expectations and where it shows practical limits

In routine use, the machine often behaves like an appliance that mostly delivers on everyday expectations: warm-up is noticeably brisk, repeated shot volumes tend to match saved settings, and the control lights communicate state clearly while brewing or steaming. During a typical morning run — a couple of espresso shots followed by a milk-based drink — the extraction and steam sequence flow without many pauses; minor adjustments to grind or tamp show predictable changes in crema and body. Small, habitual interactions become part of the rhythm, such as nudging a misaligned capsule or waiting a few extra seconds for the wand to settle before frothing; these are practical frictions rather than persistent faults.
- Cleaning rhythm — the removable nozzle and detachable water parts require attention after milk use, so a short wipe-and-rinse habit settles in quickly.
- Consistency — programmed shot memory generally reproduces the same pour, though variations appear with different capsule brands or coarser ground coffee.
- Operating footprint — the slim body and accessible controls make placement and daily handling straightforward in a tight counter space.
Where practical limits show up is in edge-case scenarios rather than daily routine: extended back-to-back brewing can require brief pauses to reheat pressure and steam performance softens if refilling is delayed or if large milk volumes are attempted with the wand. The machine copes well with standard capsules and typical pre-ground packs, yet very fine espresso grinds or unconventional capsule shapes can call for small workarounds during loading and tamping. Maintenance appears as a recurring, short chore after frequent milk drinks rather than a one-off task; it’s part of the lived experience, not an occasional surprise.
| Situation | Observed behavior |
|---|---|
| Multiple drinks in a row | Short pauses between cycles help maintain steam pressure |
| Third‑party capsules or fine grounds | Occasional fit or extraction variability |
See full specifications and listing details
Where it fits in your kitchen: footprint, clearance and the space it asks for

on a day-to-day basis the machine occupies relatively little of your counter run, so it often feels like one of the slimmer appliances you keep out. You’ll notice that it doesn’t need an entire stretch of worktop,but it does ask to be placed where you can reach the front controls and slide a cup under the spout without contorting. Give yourself a bit of lateral breathing room so the steam wand and the cup area aren’t cramped during frothing; similarly, leave a small gap behind the unit for the cord and for pulling the water reservoir straight out when it’s time to refill. In most kitchens it tucks alongside other countertop tools without demanding a dedicated station.
- Counter width — leaves a narrow strip of usable surface but needs enough side space to avoid bumping the wand when you move a mug.
- Rear clearance — allow a little room so the tank or plug can be accessed without dragging the whole machine forward.
- Overhead space — consider cabinet height if you position it under cupboards; tall mugs and access to the top controls benefit from a bit of extra headroom.
In everyday use you’ll find yourself nudging the unit occasionally — sliding it forward to empty the drip tray or to clean the counter beneath, then pushing it back into place. The removable bits that come away for washing mean you don’t need a permanent clear zone around the entire base, but plan for the small moments when you’ll lift or tilt components out and set them on the counter. A nearby outlet matters; the cord length tends to dictate which side of the counter is most convenient, so you may place it where the plug is within easy reach and the steam wand has room to operate without hitting adjacent objects. Below is a short reference of common actions and the kind of space they typically take up in routine handling.
| Action | Space to allow (typical) |
|---|---|
| Sliding out water tank | a few inches behind the machine for removal and replacement |
| Frothing milk with wand | room at the front and side for a milk pitcher and hand movement |
| Placing taller cups | remove the drip tray or move the cup slightly forward to clear the spout |

How It Settles Into Regular Use
Living with the 20-Bar Espresso Machine & Coffee Machine – Compatible with N Espresso capsule & Coffee Ground, Stainless Steel milk Frother – 34 oz Espresso Cup – Latte Machine & Cappuccino Machine, it becomes part of the kitchen scenery, its stainless surfaces softening with fingerprints and the frother gathering tiny traces of use. Over time you notice how its footprint nudges where mugs land and how morning motions — filling, tamping, rinsing — fold into the rhythm of a household. In daily routines it sits in plain view, used with the same small habits and showing light wear where hands touch. After a while it settles into routine.
As an Amazon Associate I earn from qualifying purchases. Amazon and the Amazon logo are trademarks of Amazon.com, Inc, or its affiliates. All images belong to Amazon