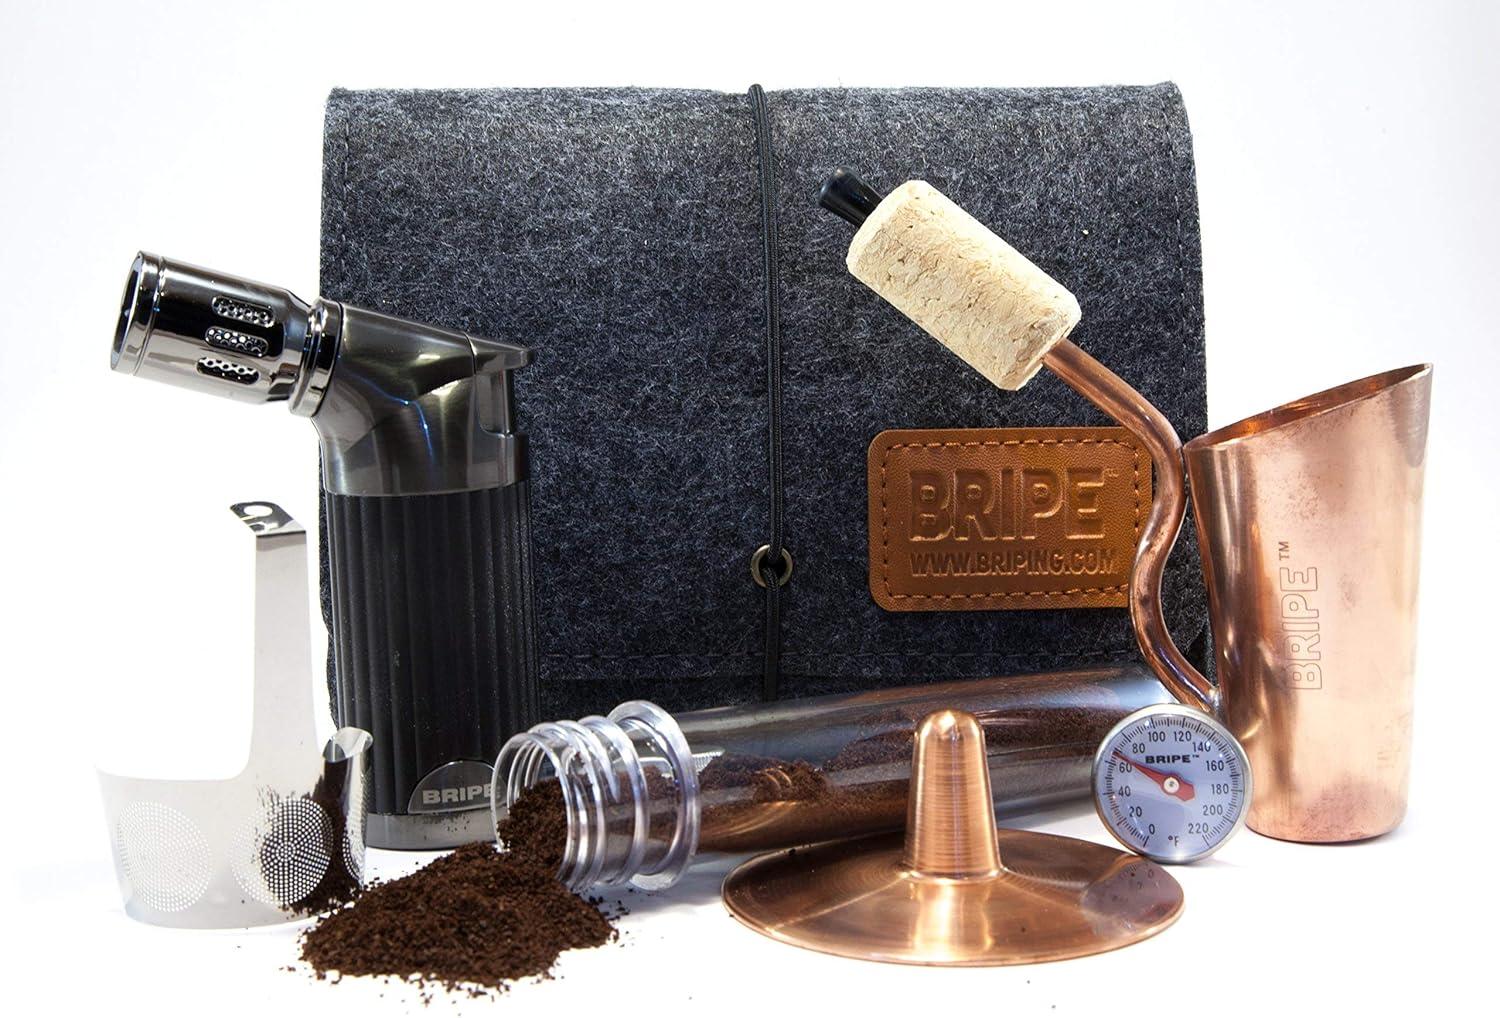
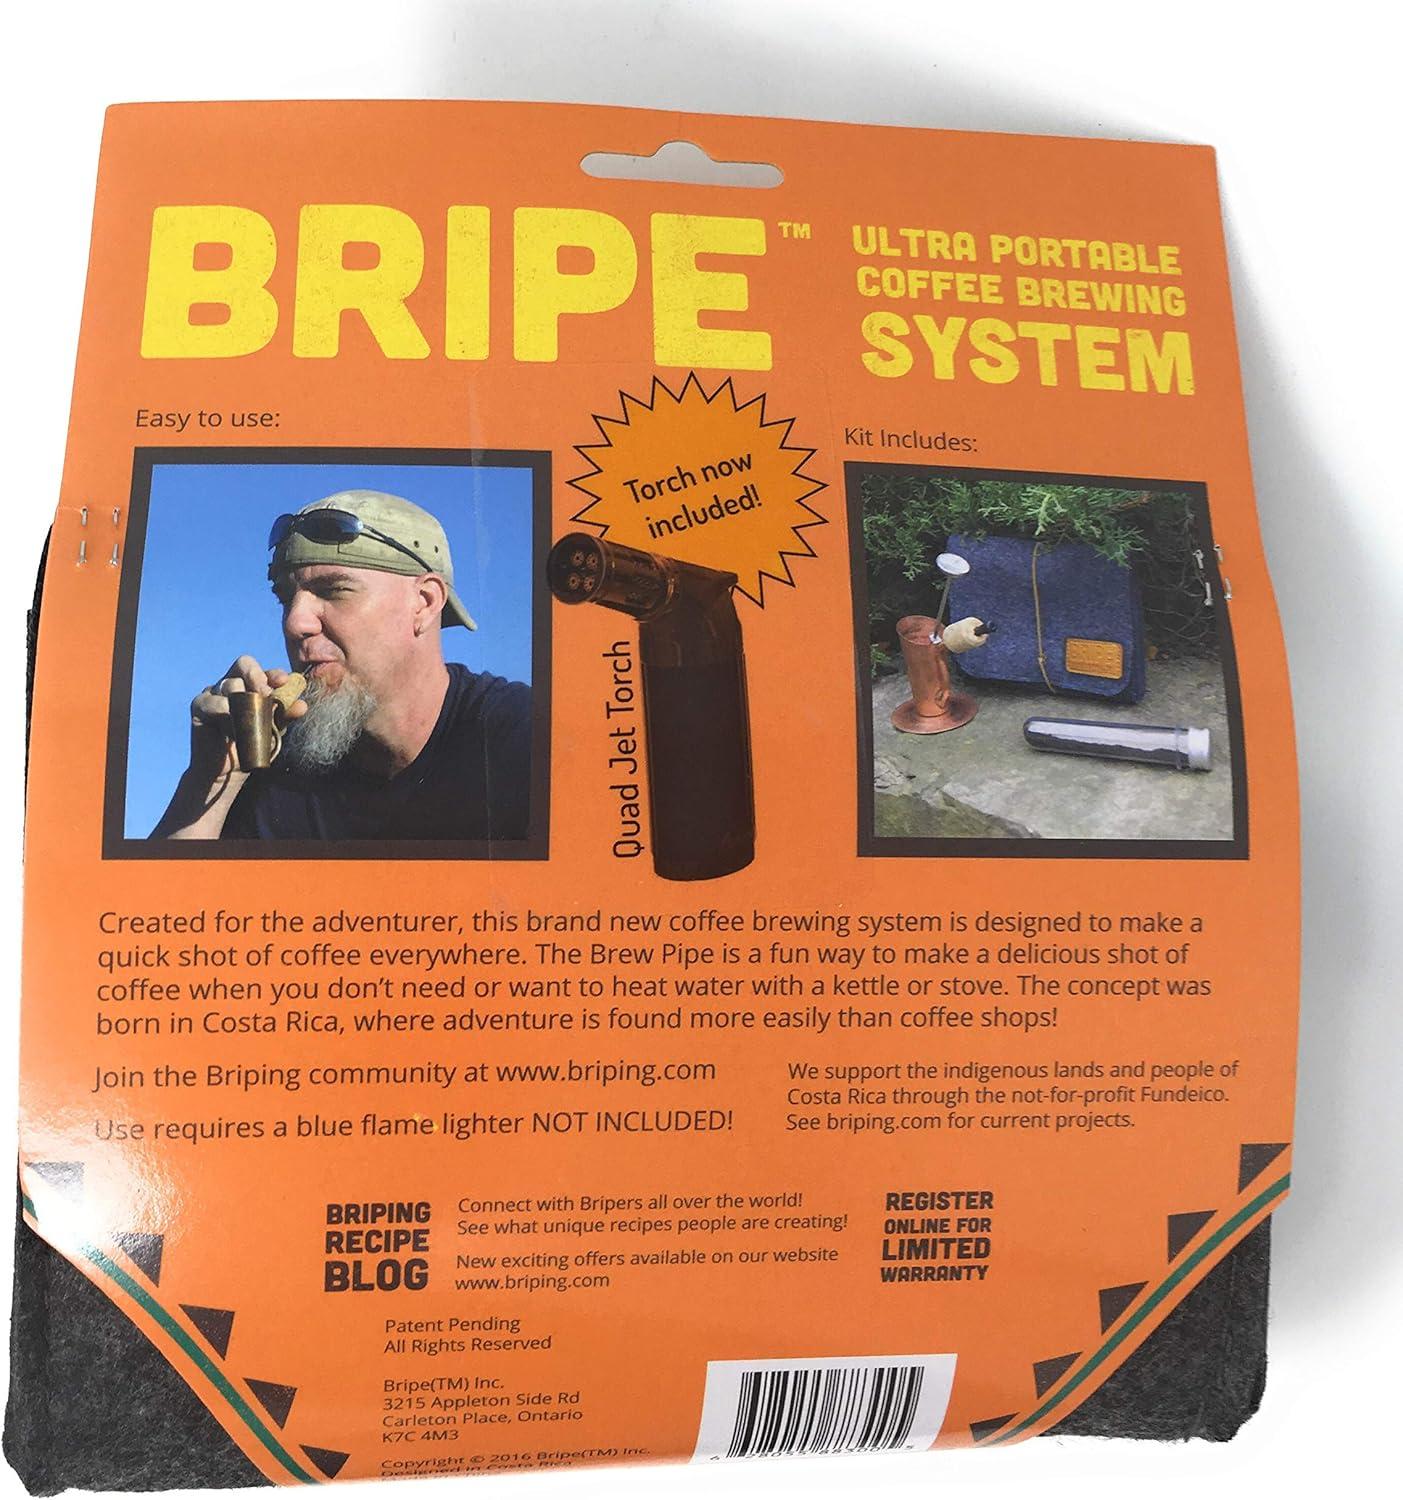
We recently took the Coffee Brew Pipe kit — a compact copper-and-silver “Bripe” with a quad jet torch tucked into a neat carrying case — on a weekend hike to see whether real coffee can be coaxed from a pocket-sized pipe. No stove, kettle, or gas canister required: just ground coffee, water, and the torch. In about three minutes and six simple steps (filter the stem, add coffee, stir in water, torch, cool and blow, than sip through the stem), it promises an espresso-like shot wherever you roam.
In this review we’ll share our hands-on impressions of setup, taste, and portability, and test how the torch, cooling plate, and reusable filter hold up in the field.We’ll also touch on the kit’s extras — thermometer, coffee tube, and the company’s tie to a Costa Rican community project — so you can decide if this little brewer is the right travel companion for yoru next adventure.
Our Overview of the Coffee Brew Pipe Kit and What We Found
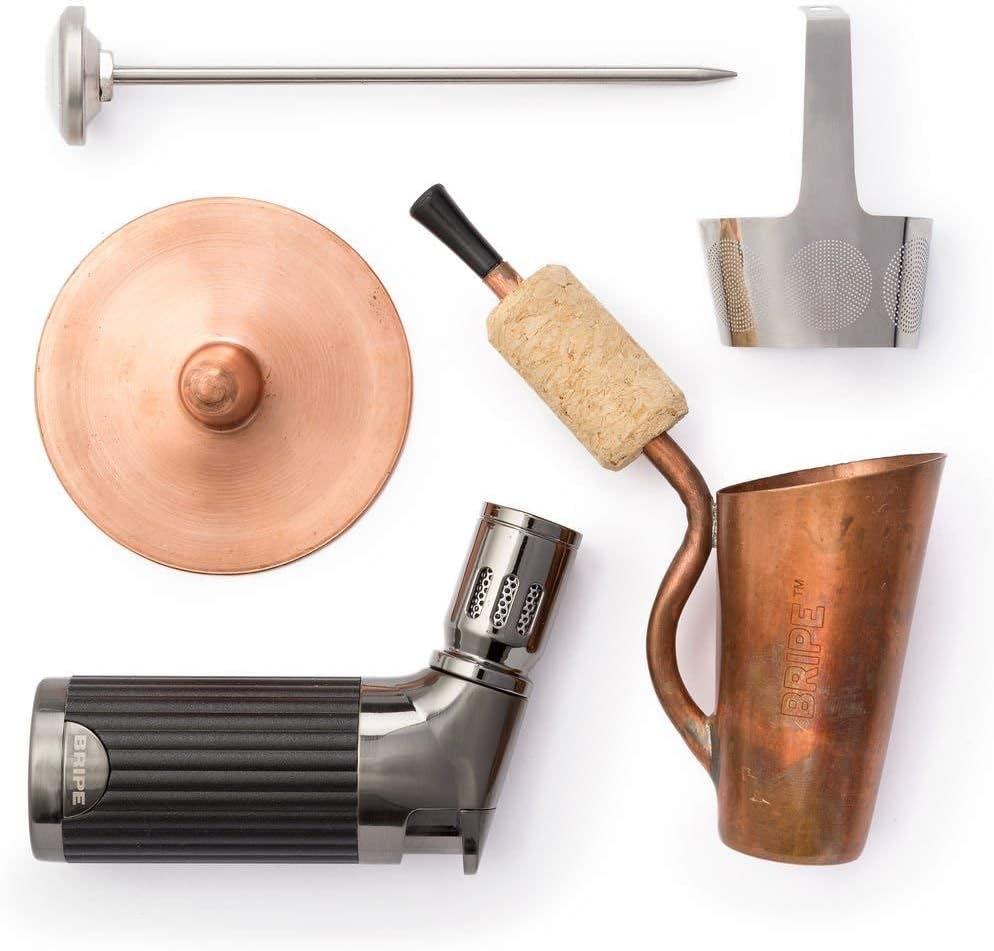
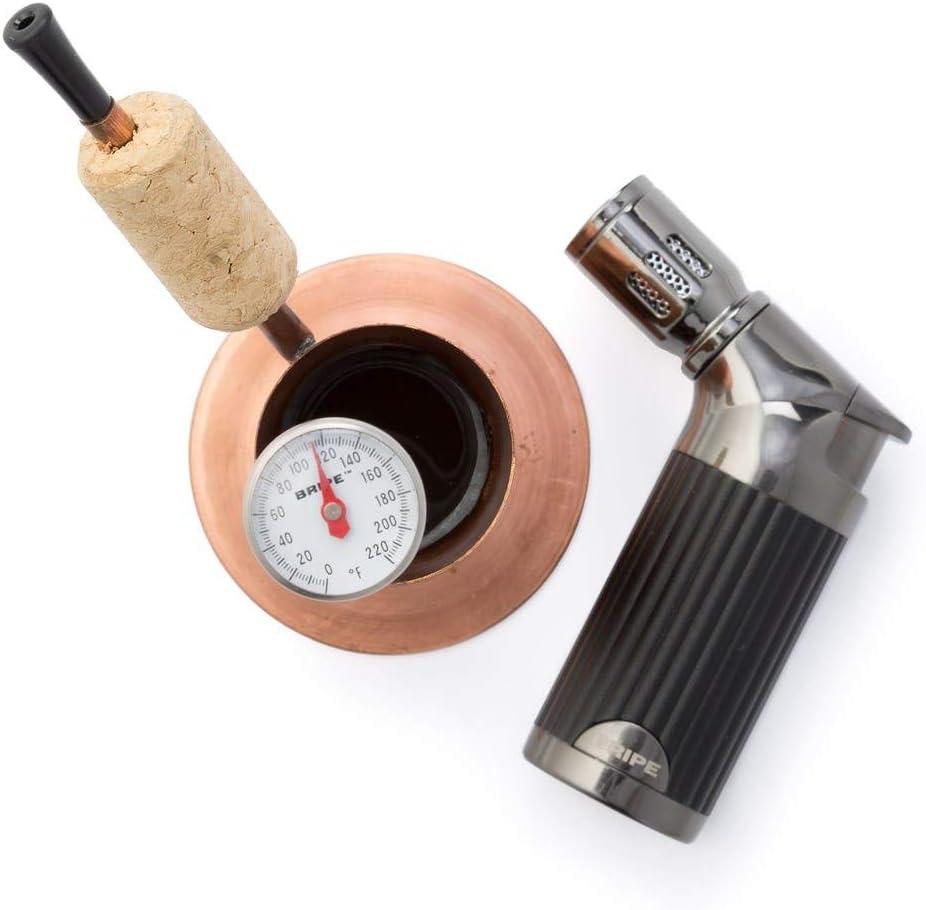
We found the little system surprisingly efficient — you can pull a hot, concentrated shot in under 3 minutes if you follow the six easy steps: cover the stem hole with the reusable variable filter, add ground coffee, stir in water, apply the quad-jet torch to brew, cool and blow into the stem to create bubbles, then draw the brew through the stem.The process feels ritualistic but fast, and the included torch and thermometer make timing and temperature control far easier than we expected. Inside the kit we appreciated the thoughtful extras:
- Complete kit items: pipe body, quad-jet torch, reusable filter, base cooling plate, thermometer, carrying case, coffee tube
- Why it works for travel: no stove, kettle, gas canister or electricity required — just water and grounds
| Part | Role |
|---|---|
| Quad-jet torch | Fast, consistent heat for brewing |
| Variable filter | Controls flow and clarity |
| Cooling plate | Helps reach sipping temp quickly |
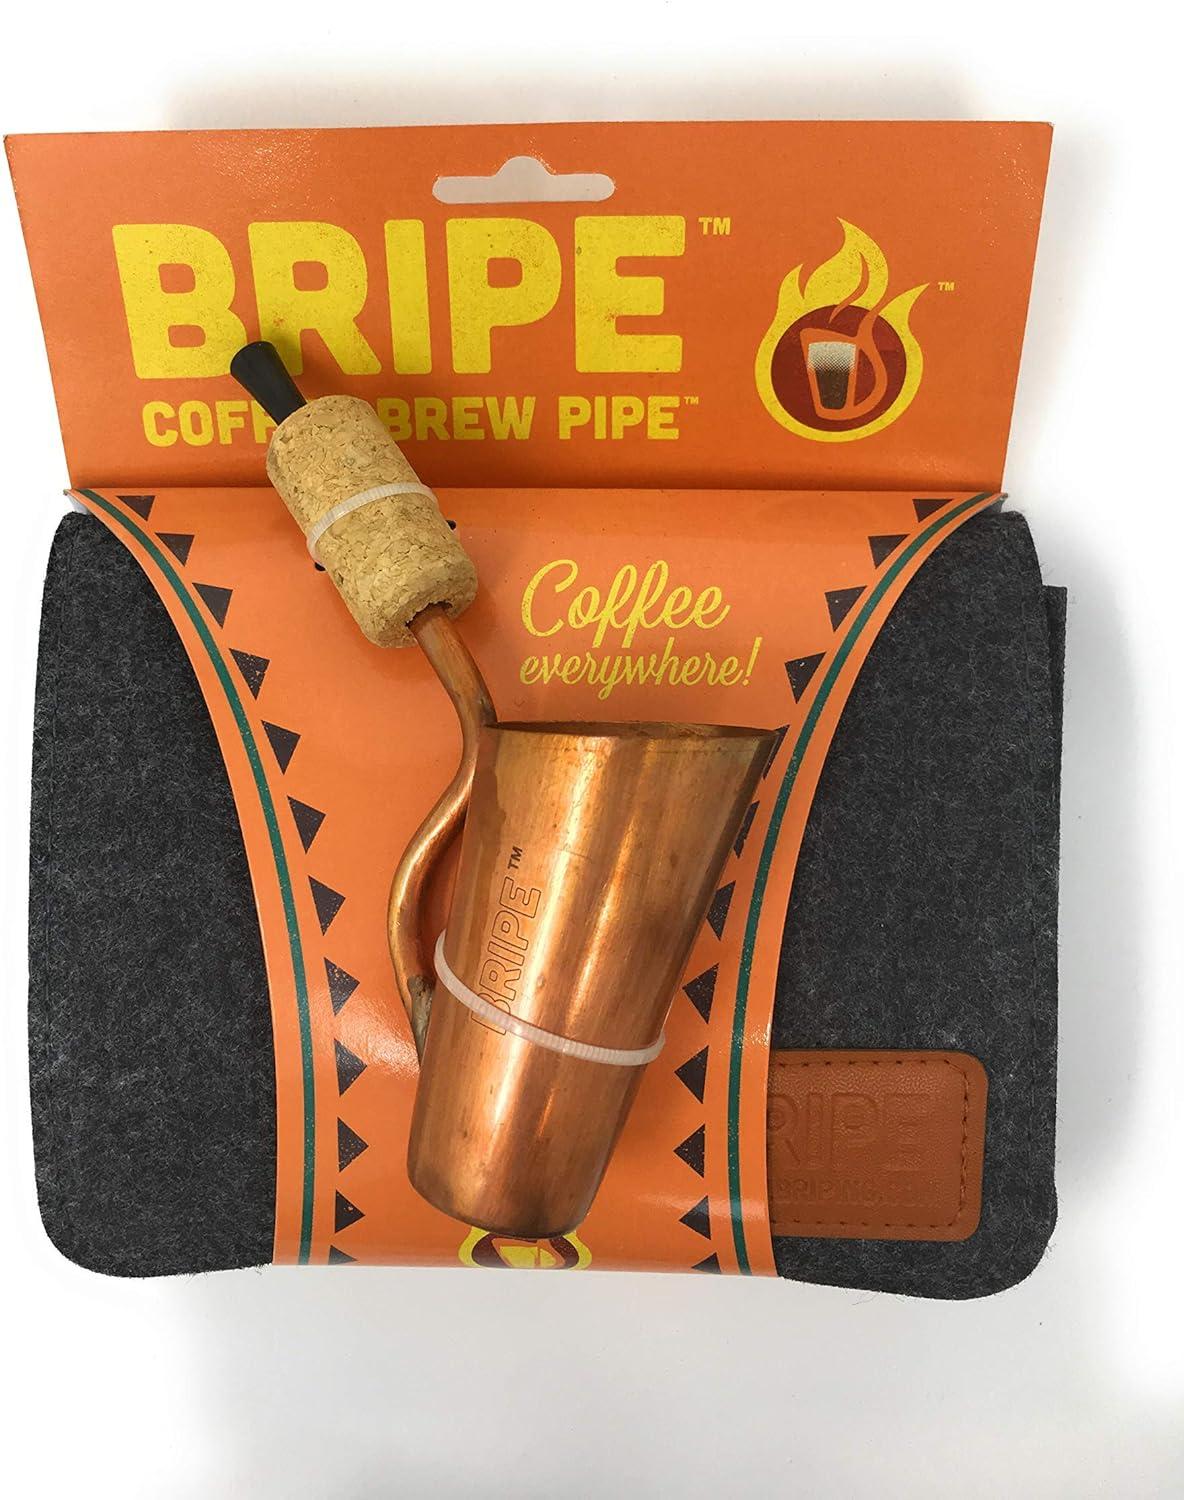
We also noted the design is built for adventure — the copper-and-silver pipe is ultra-portable and surprisingly robust, and the carrying case keeps everything organized on a hike or a river run. A portion of profits supports a roasting project with the quitirrisi Tribe in Costa Rica, which made the purchase feel a little more purposeful.Our swift pros and cons:
- Pros: fast brew, vrey portable, complete kit
- Cons: small learning curve to perfect the draw-and-bubble technique
Ready to bring this on your next trip? See it on Amazon
How We Use the Design and Build When Traveling
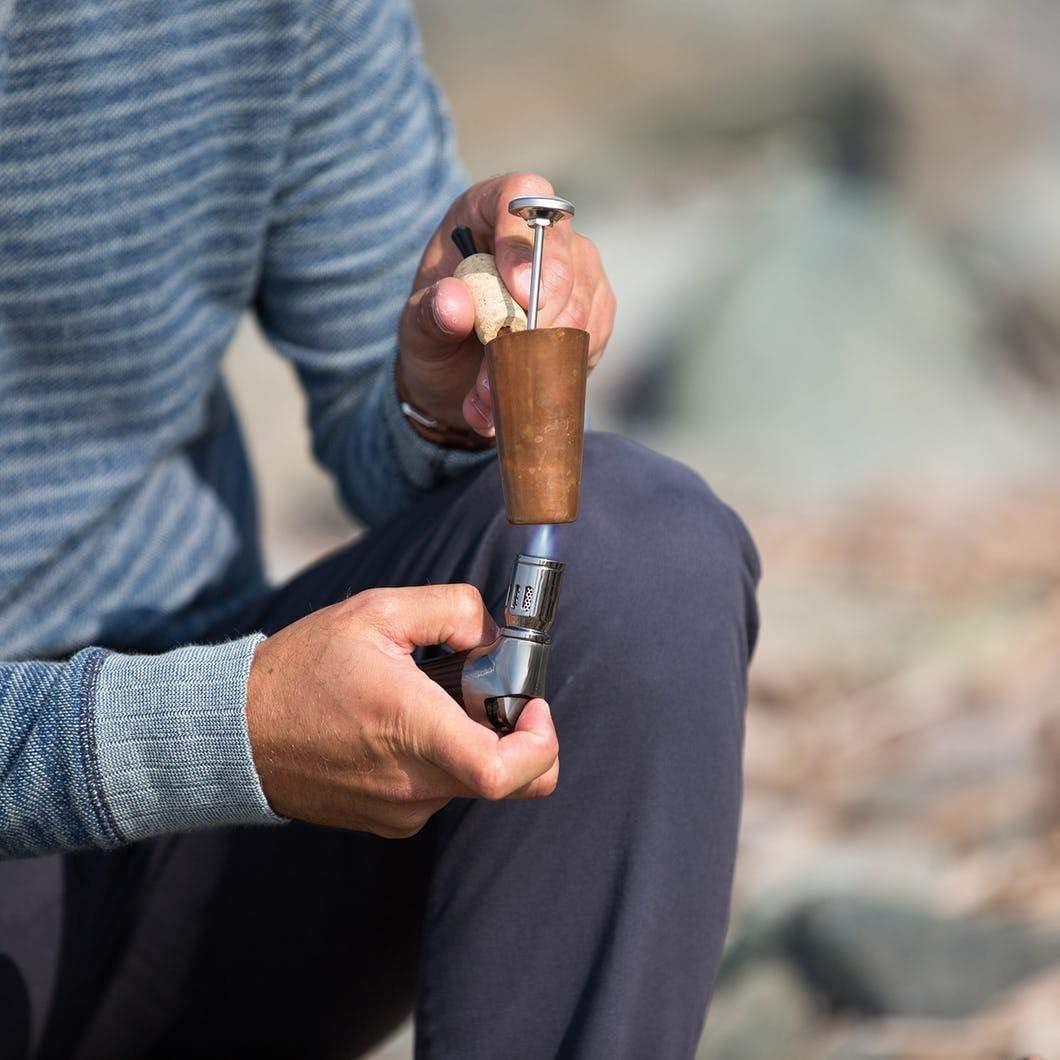
When we travel, the compact copper-and-silver build becomes our go-to for a quick, satisfying shot wherever we stop. It’s ultra-portable form factor and included quad jet torch mean we never need a kettle, stove, or power source — just ground coffee and water. In practice the routine is delightfully simple: place the reusable filter to cover the stem hole, add grounds, stir in water, heat briefly with the torch, stir and cool, then blow air to create bubbles and draw the brew through the stem. We especially appreciate that the whole process takes less than 3 minutes, which makes it perfect for morning summits, mid-run river breaks, or lazy park benches.
- Remote peaks and ridgelines
- River and camping trips
- Urban strolls and picnic breaks
| What | Why it helps |
|---|---|
| Quad jet torch | fast, wind-resistant heating |
| Reusable filter | No disposable waste |
| Carrying case | Neat, compact transport |
We lean on the thoughtful build features to make outdoor brewing predictable and tidy: the base cooling plate and thermometer help us avoid scalded hands and over-extraction, while the carrying case keeps every small piece organized. For consistent results on the trail we follow a few simple habits: pre-measure grounds into a small tube, bring an extra butane refill for longer trips, rinse the filter quickly after use, and allow the brew to cool a few seconds before drawing it through the stem.These small steps protect the components and keep cleanup minimal, so our adventures stay focused on the view — not the mess. Ready to upgrade your travel coffee routine? get yours for the next trip
What We Liked About the Included Torch Lighter and How We Control Heat
We were impressed that the kit comes with a compact quad-jet torch that feels at home in our pack — powerful enough to coax a rich shot in under three minutes without a stove, kettle, or gas canister. That concentrated flame makes short work of the brew, but what really sold us was how quickly we could dial heat up and down with simple technique: short bursts from the torch, keeping a modest distance from the copper chamber, and stirring during the brief heating cycle. To make this repeatable on the trail we rely on a few quick rules of thumb:
- Burst length: 2–4 second bursts to avoid scorching the grounds.
- Tip distance: Hold the torch an inch or two away for an even bloom.
- Stir and measure: Stir while heating and glance at the included thermometer for consistency.
These small habits let us get a predictable, clean extraction every time we stop for a break.
Heat control doesn’t end with the torch — the kit’s accessories play a big role in dialing in the cup. We use the base cooling plate and the thermometer to pull the temperature down before we blow air into the stem to create bubbles and finish the brew; that gentle cooldown prevents over-extraction and makes the final draw sweeter. Below is a quick, practical flame-to-result guide we follow on hikes and river runs:
| Torch Burst | typical result |
|---|---|
| 2 sec | Light bloom, floral notes |
| 4–6 sec | Balanced extraction, full body |
| 8+ sec | Risk of bitterness |
If you want to try our approach, grab the kit and experiment with short bursts and cooling steps until you find your perfect shot: Try it on Amazon
How It Performed for Us in Real Travel Conditions and Everyday Use
In real travel conditions we found the kit to be remarkably dependable: using the six-step process (cover the stem hole with the filter, add grounds, stir in water, torch-brew, cool and blow, then draw the brew through the stem) produced a satisfying espresso-style shot in under 3 minutes. The included quad jet torch handled windy ridge-lines and river-side breezes better than we expected, the base cooling plate and thermometer made cooling predictable, and the compact carrying case kept everything tidy in our packs. What stood out most was how little gear we needed—no stove, canister, or kettle—just ground coffee and water. Our quick field notes:
- Portability: extremely light and easy to stash
- Speed: consistent shots in minutes
- Reliability: torch performs well outdoors
- Ritual: fun and social — people stop to watch
For everyday use the kit becomes more of a weekend ritual than a daily substitute for a full mug: cleanup of wet grounds and the small serving size limit its practicality at home, but we loved it for quick office pick-me-ups and backyard demos. The components included in the case cover everything you need (reusable variable filter, thermometer, cooling plate, coffee tube), and we appreciated the mission behind the product that channels part of the proceeds to support the Quitirrisi tribe in Costa Rica.Quick performance snapshot:
| Metric | Result |
|---|---|
| Brew time | ~3 minutes |
| Pack weight | Very light |
| Included items | Torch, filter, plate, thermometer, case |
| Best for | Travel & occasional specialty shots |
If you want to try it on your next outing, grab one now and see how it changes your coffee routine: Take it on your next adventure
Cleaning and maintenance Tips We Learned the Hard Way
What we wish we’d known sooner: after our first few brews we learned that fresh grounds and torch heat leave behind stubborn oils and tiny particulates that gum up the reusable filter and stem if ignored. Always let the brew cool on the base cooling plate and use the coffee tube or a quick stream of water to flush spent grounds before they dry. The quad jet torch is indispensable for brewing,but it must never be soaked — we simply wipe the torch housing and connections with a damp cloth and keep the fuel valve dry. When disassembling, remove the variable filter and thermometer, give the pipe a gentle shake to expel loose grounds, and blow air through the stem (the same trick we use to create bubbles when brewing) to help dislodge trapped residue. Be careful with the copper and silver body — aggressive scrubbing leaves scratches and dents that change the seal and feel of the draw.
Practical routine we now follow: a short, consistent maintenance ritual after each outing saves hours later. Our checklist keeps things simple:
- Rinse filter and stem immediately,then soak the filter in warm,soapy water for 10–15 minutes.
- Wipe the torch clean; never immerse it. Check fuel connections before packing.
- Use a soft brush or the coffee tube to clear the stem, then dry fully before storing in the case.
| Part | Quick Care tip |
|---|---|
| Reusable filter | Rinse, soak, air-dry |
| Stem & pipe | Blow, brush, dry |
| quad jet torch | Wipe only, keep dry |
| Carrying case | Empty crumbs, air out |
Ready to Brew on Your Next Adventure — Buy Now
Brewing Tips We Use to Get the Best Espresso and Tea from the Kit
When we brew outdoors we focus on consistency over tricks: always seat the reusable filter snugly to cover the stem hole,add a fine grind for espresso (or a coarser leaf for tea),then stir gently as we pour in hot water. Use the quad jet torch in short, even bursts while watching the thermometer — our sweet spot is right under 95°C (about 200°F) for coffee shots to avoid bitterness; tea often benefits from a slightly lower target. After a brief brew (the whole routine takes under three minutes), we set the pipe on the base cooling plate, blow air through the stem to make bubbles, then draw the concentrate through the tube. small rituals that make a big difference: preheat the metal parts with a quick torch burst, keep your grind uniform, and always cool before sipping.
- Filter: seat fully
- Grind: espresso-fine / tea-leaf coarse
- heat: short torch bursts, watch thermometer
- Finish: cool on base, blow bubbles, draw through stem
For versatility on the trail we switch ratios depending on the mood: denser shots when we want a true espresso hit, gentler dilutions for tea or longer sips. The carrying case and coffee tube make pre-measured doses easy to tote, and conserving butane with brief, targeted bursts keeps the torch functional for multiple brews.Below is our quick reference for repeatable results — simple, portable, and effective.
| Style | Coffee/Tea | Water | Brew Time |
|---|---|---|---|
| Espresso Shot | 10–12 g | 25–35 ml | 90–120 s |
| Strong Tea | 3 g leaf | 150 ml | 120–180 s |
| Light Brew | 6–8 g | 60–90 ml | 60–90 s |
Our Final Recommendations on Who Should Pack This Kit and Why
We reccommend packing this kit when we know we’ll need a fast, compact caffeine fix far from creature comforts. Ideal for hikers, paddlers, backpackers, and festival-goers, it requires only ground coffee, water and the included quad jet torch — no electricity, stove or gas canister. The six-step brew (filter the stem hole,add grounds,stir in water,torch-brew,cool and blow,then sip through the stem) delivers a shot in under three minutes,which makes it perfect for short breaks on the trail or quick pick-me-ups between shifts on outdoor adventures. Our pick list:
- Day hikers & summit chasers — rapid, lightweight brewing
- Kayakers & rafters — zero reliance on stoves
- Car campers & road-trippers — compact kit and neat carrying case
- Gift hunters — unique present for coffee lovers
Why we pack it comes down to speed, completeness and a purposeful purchase: the kit includes a reusable variable filter, base cooling plate, thermometer, coffee tube and carrying case so we’re ready right out of the bag, and the brew sequence is reliably fast and simple. It also appeals to those who want their gear to matter — a portion of profits supports a roasting operation with the Quitirrisi Tribe in Costa Rica, so we feel good about bringing it along. Quick reference:
| Best Use | Why it Shines |
|---|---|
| summit breaks | Under 3-minute shots |
| White-water trips | No stove needed |
| Gift giving | Compact, memorable |
Ready to make your outings caffeinated? Grab one for our next adventure
Pros & Cons —
We tested the Bripe on trails, at a river put-in, and on a windy overlook. Below are the highlights and caveats that shaped our experience.
Pros
- Ultra‑portable: The pipe, torch and accessories tuck into a small case — we could carry it on every outing without adding bulk.
- Fast, single‑serve brew: A coffee shot in under three minutes made it easy to grab a hot sip between moves on the trail.
- All‑in kit: Filter, cooling plate, thermometer and quad‑jet torch are included — we didn’t need extra gadgets to get started.
- Low‑tech, high reward: No electricity, stove or gas canister required — ideal when we’re off‑grid.
- Thoughtful mission: we appreciated that part of the profit supports a roasting project with the Quitirrisi Tribe.
- Durable materials: Copper/silver construction felt sturdy and outdoorsy — it handled the elements better than a paper cup ever could.
cons
- Learning curve: The six‑step method (filter, torch, bubbles, suction) took us a few tries to master and gets fiddly in wind or cold.
- Safety/flammable fuel: The quad‑jet torch is great for rapid heating but adds handling risk and logistics — refills and flight restrictions matter.
- Small yield: It’s a concentrated coffee shot, not a mug — we still needed extras for sharing with a group.
- Cleaning and maintenance: Wet grounds and small parts require attention after each use; cold conditions made rinsing awkward.
- Heat and burn risk: Metal parts can get very hot; the cooling plate helps,but we stayed careful when handling.
Quick Snapshot
| Top Strength | Top Weakness |
|---|---|
| True portability — brew anywhere | Requires practice and careful handling |
| Complete kit — torch + filter included | Torch fuel logistics and safety concerns |
| Quick, satisfying espresso‑style shots | Small serving size, not for groups |
we loved how the Bripe made good coffee possible in places we’d normally settle for instant. It’s a niche tool — brilliant for one‑person adventures and patient brewers, less ideal for group hospitality or minimalist carry rules (like flights or sealed pack lists).
By the time we folded our map and zipped the pack closed, the Bripe had earned a permanent spot on our gear list. It turned a handful of simple ingredients—ground coffee and water—into a bold little espresso shot in under three minutes, using a six-step ritual that felt part science, part campfire alchemy. The quad-jet torch, reusable filter, cooling plate and thermometer all fit into a tidy carrying case, so whether we were on a ridge line or a park bench, a proper brew was always just a few careful breaths away.
We appreciated how lightweight and self-contained the kit is,and how it turns a brief coffee break into a small,satisfying ceremony. There’s a bit of a learning curve with heat control and the bubbling technique, and you won’t get a full mug—this is intentionally a shot-sized, on-the-go experience—but for the moments when great coffee matters most, the Bripe delivers.
Beyond the convenience, we liked knowing our purchase supports a larger purpose: a portion of profits go toward building a roasting operation with the Quitirrisi Tribe in Costa Rica, which made bringing the Bripe feel like more than just a convenience.If you want a compact, adventure-ready way to brew shots wherever you wander—or a unique gift for the traveler in your life—check it out for yourself and see current availability here:
See the Bripe Coffee Brew Pipe on Amazon
As an Amazon Associate I earn from qualifying purchases. Amazon and the Amazon logo are trademarks of Amazon.com, Inc, or its affiliates. All images belong to Amazon