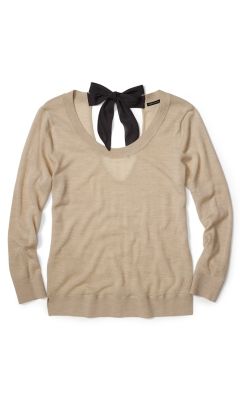
If you’re looking to add a unique and stylish twist to your sweater collection, why not try making your own DIY back bow sweater? This fun and creative project allows you to customize a plain sweater and transform it into a one-of-a-kind piece that is sure to turn heads.
To start this project, all you’ll need is a sweater of your choice, some fabric scissors, and a piece of fabric or ribbon to create the bow. Begin by cutting a straight line down the center of the back of the sweater, stopping a few inches from the bottom hem. Be sure to measure and mark the cutting line to ensure it is centered and straight.
Next, take your piece of fabric or ribbon and fold it into a bow shape. You can choose a fabric that matches the color of your sweater for a cohesive look, or opt for a contrasting color to make a bold statement. Once you have your bow shape, carefully attach it to the back of the sweater using a needle and thread, or fabric glue for a quicker option.
Once your bow is securely attached, you can further customize your sweater by adding embellishments such as buttons, sequins, or patches. Get creative with your design and have fun experimenting with different combinations to make your sweater truly unique to your personal style.
Not only is making a DIY back bow sweater a fun and rewarding project, but it also allows you to breathe new life into an old or plain sweater that may be sitting in your closet. By adding a simple bow to the back, you can instantly elevate the look of a basic garment and create a piece that is both fashionable and individualistic.
So why not give this DIY project a try and create your own back bow sweater? Whether you’re a seasoned crafter or a novice looking to try something new, this project is a great way to unleash your creativity and add a personal touch to your wardrobe. With just a few simple materials and some creative vision, you can easily transform a plain sweater into a stylish and chic statement piece that is sure to become a favorite in your closet.


